Use the Groups Tool to define a collection of documents (a group) within
your dataset. Once
a group has been created you can view
and query documents in the group. Grouping
also provides an easy way to select the same set of documents in later
sessions.
Accessing
the Groups Tool
To
open the Groups window, perform the following procedure.
Click the Groups button on the
IN-SPIRE main toolbar, or from the IN-SPIRE main toolbar Tools menu, select
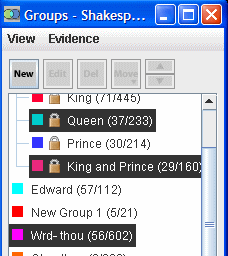
Groups. The Groups Tool
window will display, with any active groups highlighted.
Select a group from the list. The
documents in that group will highlight in the Galaxy and ThemeView.
Groups can be contained in folders.
To open a folder, click on the toggle opposite the folder . The folder will open, displaying the groups inside.
To close an opened folder, click on the toggle
. The
toggle position tells you if the folder is open or closed. A toggle turned
to the right is closed, while one turned down is open. A single click
is all that is required to open or close a toggle.
Creating
a Group
To create
a group from within the Groups Tool, perform the following procedure.
In the Groups window, click the New
button and select Group... from the drop-down list. A group is created
that includes the selected documents, and the Edit Group window opens,
allowing you to change the default name and color assignment. The Edit
Group window option is on by default and can be turned
off.
Enter a name in the Group Name field.
Select a color for the group from the color swatches.
Click OK. The
Groups list will display the group name and the number of documents in
the new group.
Turning the New Group
Prompt Off
When you create a new group the Edit Group window will display offering
various group options such as group name and color. You
can turn off this default behavior by performing the following procedure.
from
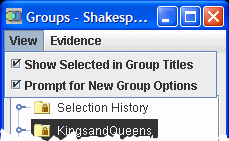
the Groups window select the View menu. A
drop-down menu will display.
If the Prompt for New Group Options is checked,
select it to remove the check from the checkbox. When
the check is removed from the checkbox, the option is off. The
next time you create a new group it will be added to the list at once
with a default title and assigned a group color. You
can change the title and color later if you wish.
Creating a Group Using Queries
In the Queries Tool,
perform a Word Query to select a set of documents, or perform a Query
By Example and use the slider to select a collection of documents that
are similar to your example text.
Click Group
Results. The
Edit Group window will display.
In the Group Name field, type a name for the group
and click OK. The
new group will be added to your list in the Groups window.
Creating a Group Using the Document
Viewer
To create a group containing documents that are selected and visible
within the Document Viewer, perform the following procedure.
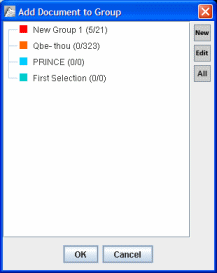
From the Editdrop-down menu, select Add
Document to Group. The
Add Document to Group window will display.
Click the New button . The
Edit Group window will display.
Enter a name for the group.
Choose a different color for your new group, if you
wish.
Click OK. The Edit Group window closes. The new group
is now listed in the Groups window list.
Changing the Name or Color Assigned
to a Group
Select the group from the Groups list.
Click the Edit button. The Edit Group window opens.
You can change the Group Name or use the color
chooser to choose a different color.
Click OK.
Deleting a Group
Highlight the group in the Groups list and click the Del
(Delete) button.
Saving Groups
Groups are automatically saved when you close the dataset
or exit IN-SPIRE. From the IN-SPIRE main toolbar File menu you can select
Save Session to save groups (as well as queries, viewed documents, and
outliers).
Displaying
Group Member Documents in the Galaxy
To display
member documents in the group color in the Galaxy, perform the following
procedure.
Open the Groups window. The
groups list will display in the window.
Highlight
the group in the groups list by clicking on its name. To highlight several
groups whose names are contiguous, click on the name of the first group,
then Shift-click on the last group. To
highlight non-contiguous groups, Ctrl-click on each in turn. The
documents in the selected group will display in the Galaxy highlighted
in the group color or colors.
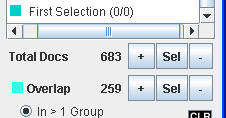
Finding the Number
of Documents in a Group
The total number of unique documents in all highlighted
groups displays in the Total Docs
number below the list of groups.
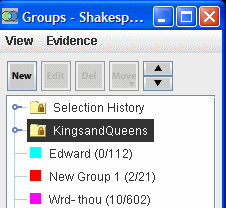
Finding the Number of Documents Selected in a Group
The number of selected documents within a group will display
next to the group title, for example, (0,66) indicates that you have no
documents selected at the moment in that group. This
option is turned on by default. To
turn it off, from the Groups window View menu select Show Selected in
Group Titles and the checkmark will be removed.
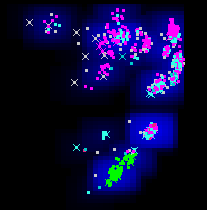
Finding the Overlap Between Groups
Overlap
includes documents that occur in more than one highlighted group; they
are colored turquoise in the Galaxy by default. Refine this collection
by selecting In > 1 Group to color as overlapping any documents occurring in two or
more groups, or select In All Groups to color as overlapping any documents which occur in all
highlighted groups. The
figure below shows an example of the various forms of overlapping documents
in three groups.
Using the Select Buttons
Select
buttons for Total Docs
Adds all documents in a highlighted group or groups to the selection
set. In the Galaxy.
Select only the documents in the highlighted group or groups.
Deselects all documents in a highlighted group or groups.
Select
buttons for Overlap
Adds to the selection set only those documents which occur in more
than one highlighted group, or all highlighted groups, depending on which
radio button option has been chosen.
Selects only those documents which occur in more than one highlighted
group or in all highlighted groups, depending on which radio button option
has been chosen.
Removes only those documents which occur in more than one highlighted
group, or in all highlighted groups, depending on which radio button option
has been chosen.
Clears all selected documents.
Viewing
Evidence in Grouped Documents
To
view thegrouped documents with the Evidence Viewer tools,
from the Evidence menu, select Show Evidence Viewer. TheEvidence
Viewer window will display the Summary of available evidence.
All the documents in highlighted groups
will be listed and accessible. Documents highlighted in the Galaxy are
always visible in the Document Viewer.
Organizing
the Groups List
You
can rearrange and organize your groups into logical folders for easy reuse.
Use the
following techniques to work with groups and folders.
Creating a New Folder
To
make a new folder, click the New
button and select Folder from the drop-down list.
Enter
the name of the new folder.
Or
To rename an existing folder, highlight the folder and click Edit. The Edit Group window opens. You can
change the name there.
Moving an Existing Group into a Folder
To
move a group into a folder or to move a group from one folder to another,
highlight the name of the group and click the Move button . From the drop-down list, select the name of the folder to
which you want to move it.
Changing the Order of Folders
You
can change the order of folders or groups by moving them up or down in
the Groups list. To
change the order, perform the following steps.
Highlight
the group or folder you want to move.
Click the up
or down arrowto move the item up or down in the list.
To
see helpful information about a part of the Groups window, hover the
cursor over the area. Brief
information will display in fly-out Help.
 on the
IN-SPIRE main toolbar, or from the IN-SPIRE main toolbar Tools menu, select
Groups. The Groups Tool
window will display, with any active groups highlighted.
on the
IN-SPIRE main toolbar, or from the IN-SPIRE main toolbar Tools menu, select
Groups. The Groups Tool
window will display, with any active groups highlighted.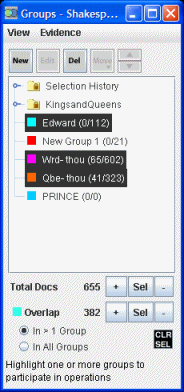
 . The folder will open, displaying the groups inside.
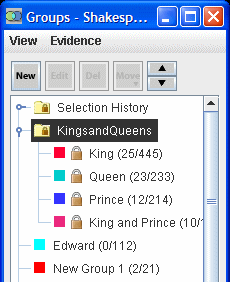
 . The
toggle position tells you if the folder is open or closed. A toggle turned
to the right is closed, while one turned down is open. A single click
is all that is required to open or close a toggle.
. The
toggle position tells you if the folder is open or closed. A toggle turned
to the right is closed, while one turned down is open. A single click
is all that is required to open or close a toggle. 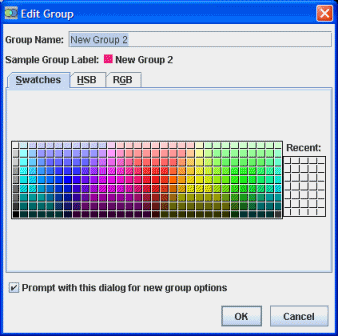
 .
.
 . The
Edit Group window will display.
. The
Edit Group window will display. 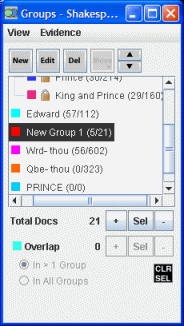
 to color as overlapping any documents occurring in two or
more groups, or select In All Groups
to color as overlapping any documents occurring in two or
more groups, or select In All Groups  to color as overlapping any documents which occur in all
highlighted groups. The
figure below shows an example of the various forms of overlapping documents
in three groups.
to color as overlapping any documents which occur in all
highlighted groups. The
figure below shows an example of the various forms of overlapping documents
in three groups. 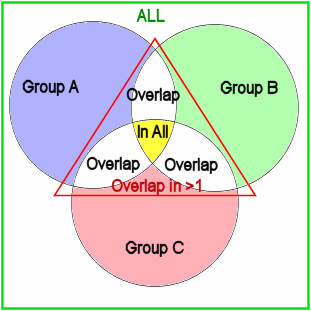


 . From the drop-down list, select the name of the folder to
which you want to move it.
. From the drop-down list, select the name of the folder to
which you want to move it. to move the item up or down in the list.