The document viewer enables you to view the text of documents in your dataset along with various document attributes such as relevance and group membership. You can use the document viewer to add notes to documents and view notes and document markings others have created.
If you have a translation engine installed on your system or server, you can use the integrated translation capabilities of IN-SPIRE to translate and view documents in both the original language and a language of your choice.
Examining a Document
Querying Documents
Changing the Group
Adding a Document to a Group that Does Not Belong to a Highlighted Group
Tracking Changes
Marking Conflicting Evidence
Select one or more documents. Ways to select documents.
From the IN-SPIRE main toolbar, click the Document
Viewer icon  or from the IN-SPIRE main toolbar Tools menu,
select Document Viewer..
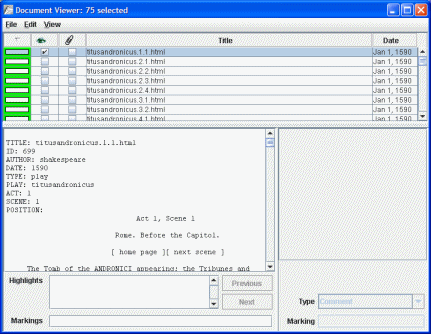
The document
viewer will display a list of all the documents you selected, with the
text of the first document in the list visible in the viewing area.
or from the IN-SPIRE main toolbar Tools menu,
select Document Viewer..
The document
viewer will display a list of all the documents you selected, with the
text of the first document in the list visible in the viewing area.
In the list of document titles, click on the name
of the document you want to view. By default, IN-SPIRE will display the
document with the original line breaks.
To view the document with the 'extra' lines removed,
from the View menu, un-select Original Format.
You can navigate through the documents in the dataset, sort, and display various elements in a document.
IN-SPIRE will keep track of which documents you have viewed since the time you opened the dataset by displaying a checkmark in the Viewed column of the Document Viewer. Sometimes you will want to abandon the information about which documents you viewed during your current session. To revert to the list of documents viewed at the start of your session, from the IN-SPIRE main toolbar File menu select Clear Document Viewed Status. The list of all documents you have viewed since the start of your session will be deleted. The documents themselves will not be deleted, just the information about whether you have viewed them or not.
In addition to the scroll bar to the right of the document list, you can use your keyboard up arrow and down arrow to scroll the document list, displaying the documents before or after the currently-displayed document in the list.
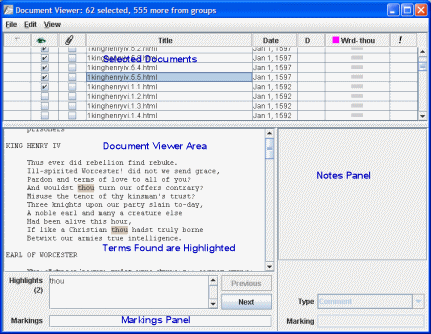
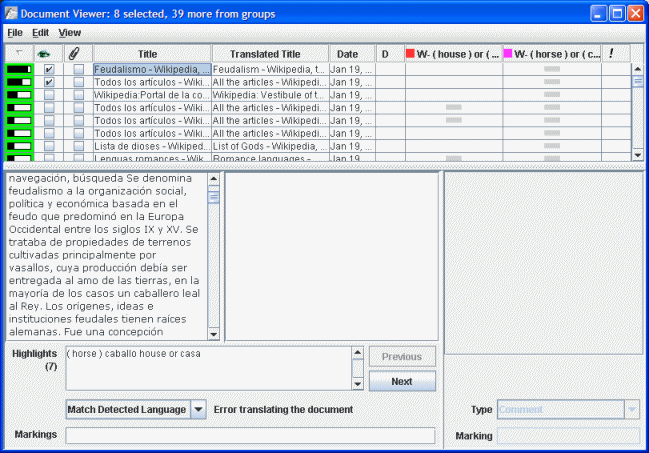
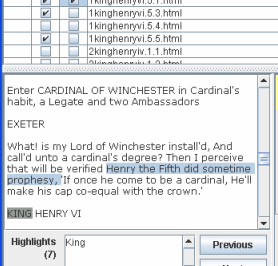
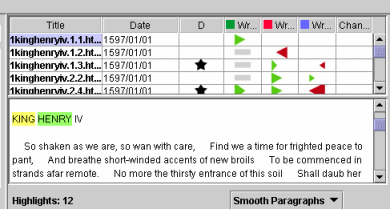
To search for a word or words in the selected documents, in the Highlight text box type the word you want to find and press Enter. The number of words in a document will display after Highlights. Each instance of the word in the displayed document will be highlighted. It will also be highlighted in any other selected document in which it is found.
Click the title of a document to display the document with search word hits highlighted.
Click on the column header to sort documents in ascending alphabetical order (titles beginning with A will be at the top).
Click on the column header again to sort documents in descending order (titles beginning with Z will be at the top).
Click the Edit menu, select Add document to Group and select the group from the Add Document to Group list. Click OK.
Click the Edit menu, select Remove document from Group and choose the group from the Remove Document from Group wind. Click OK.
Markings are enabled if you have special predefined document markings in your dataset. Contact your IN-SPIRE technical representative for more information on this feature.
By default, the document displayed in the Document Viewer's lower panel is positioned so that the topmost visible line begins with the title field that you defined when you created the dataset; oftentimes this is TITLE:. You can set a different "start line" by editing the inspire.ini file, which is found in IN-SPIRE's \DatasetRoot\config\app folder.
Once you have the translation turned on, perform the following procedure.
Select one or more documents in your dataset. You can select collections of documents with the Groups tool.
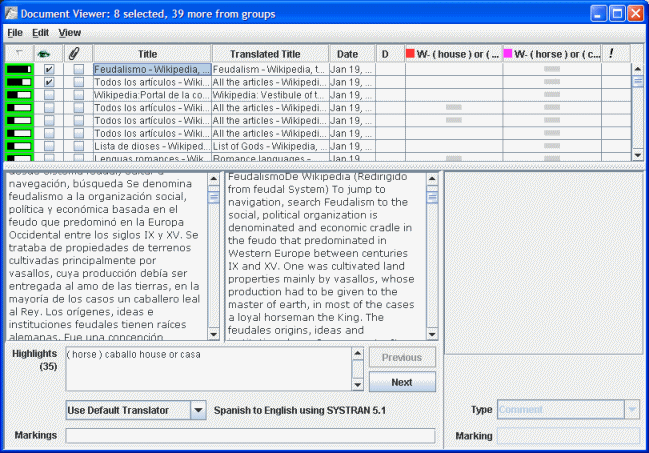
The selected documents will display in the Document
Viewer in the original language and in the translated language. The
first document in the groups is selected by default.
From the translator selection drop-down menu,
select Use Default Translator.
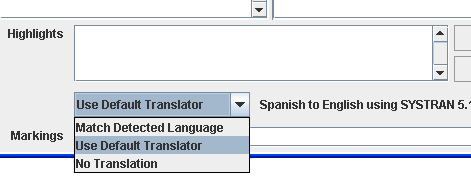
The selected document will be translated, with the translation displaying
in the middle pane.
You can enlarge the viewing area by turning off the Notes viewing panel. From the View menu select the checked Notes Panel to turn it off.
By default the scroll bars in the document are synchronized so that the same area of text is displayed in both versions. You can change this setting under the Document Viewer View menu. Document titles show up in the Title and Translated Title columns above the document text.
If you created a group from a Word Query, scroll
until you find the word or phrase from the query highlighted in the document.
The words
will be highlighted in both languages.

The Word Query itself is also translated and displays in the groups
columns.

You can use the Document Rater tool to indicate the level of evidence to support your hypothesis.
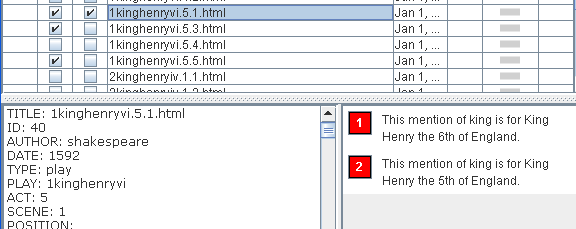
You can add notes to documents as you view them. These notes can later be searched with the Query tool Notes tab. To add a note to a document, perform the following procedure.
In the Document Viewer, select a document by clicking on the Title. The document text will display in the document viewer area.
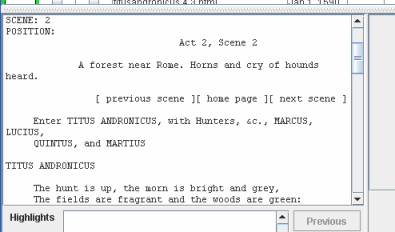
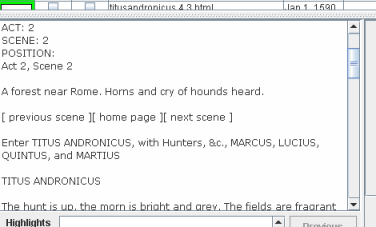
Scroll through the document text.
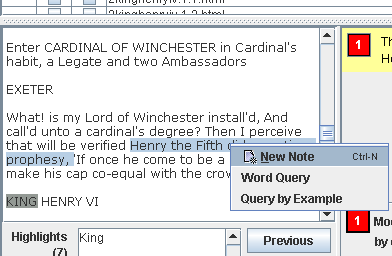
When you reach an area where you want to add a
note, highlight the text of interest.
Right-click on the highlighted area and from the
drop-down menu select New Note.
A new numbered note will be added to the Notes Panel.
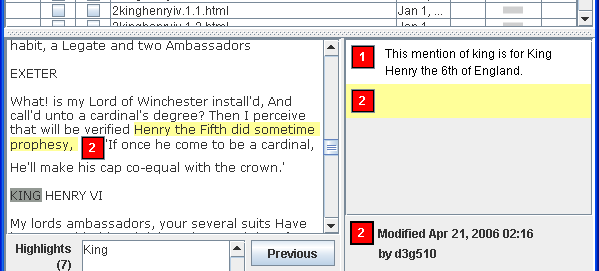
Type your new note.
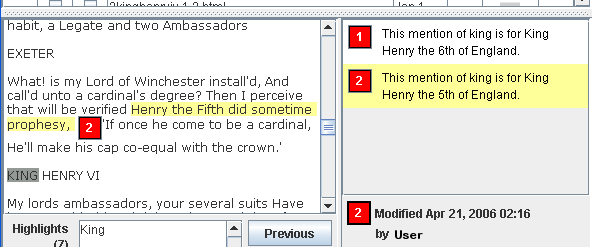
The new note will be saved when you click elsewhere in the window.
To view the note later, click on the document
title, and the note will display in the Notes panel.
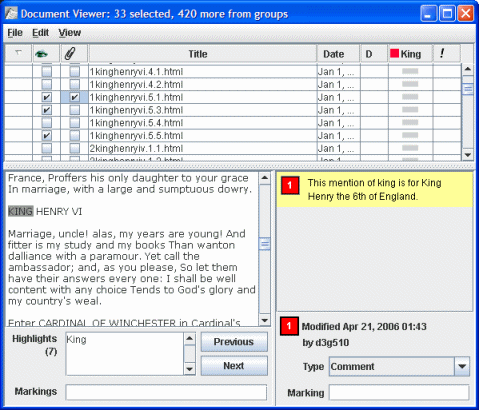
To examine any document in
a highlighted group, click on a document listed in the
document list of the Document Viewer. The text of the document displays
in the document viewer panel immediately below the document list
 .
.
The evidence consists of rows of title blocks  followed
by evidence blocks
followed
by evidence blocks  , one for each active group.
To query documents in the list and see terms highlighted in the document text perform the following procedure.
Select a document from the list by clicking in the title block. The document will display in the document viewer panel.
In
the query panel below the document viewer, type terms
in the panel below the document text, and press Enter. If the terms are
found in the document, they will be highlighted in the text. Highlights:
<number> tells you how many terms are found in the currently-selected
document.
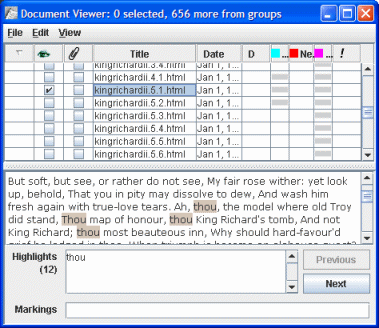
Click on another document in the list to display the number of query terms found in that document. Use the Previous and Next buttons to jump to the next or previous occurrence of the term. If you created a group using a query, the query terms will automatically display in the panel when the group is highlighted in the Group list.
To change the group to which a document belongs, perform the following procedure.
To remove a document from a group, look across the row for a document and find the column for the group you want to remove.
Click on the cell. The
Document Rater will display.
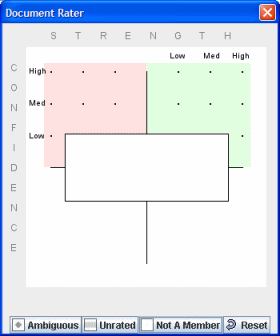
In the Document Rater click on the Not a Member button.
To add a document to a different group, look across the row for a document and find the column for the group to which you want to add the document. Click on the cell and in the Document Rater select a rating.
To add a document from the dataset which currently does not belong to any of the groups in the Evidence Viewer to a group, perform the following procedure.
From the Galaxy, select the document.
From the Galaxy main menu toolbar, click Document
Viewer  .
.
From the Document Viewer View menu, select Add Document to Group and select the group from the Add Document to Group window.
Click OK. The document displays in the Document Viewer's Groups pane.
|
|
An exclamation point will display in the Changed column to show that one or more of the annotations for a document have been changed. |
|
|
In the D column, a star marks special cases where a document both supports and refutes one or more highlighted groups, or one or more ambiguous annotations. |
4/27/06

