![]() Video tutorial available.
Video tutorial available.
Use the Groups panel on the right sidebar to define a collection of documents (a group) within your dataset. Once a group has been created you can view and search documents in the group. Grouping also provides an easy way to select the same set of documents in later sessions.
Groups enables you to:
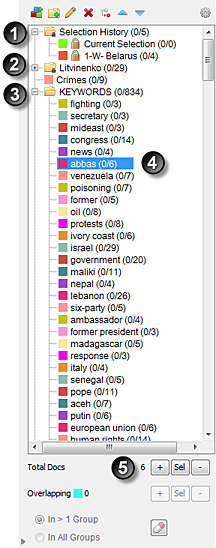 |
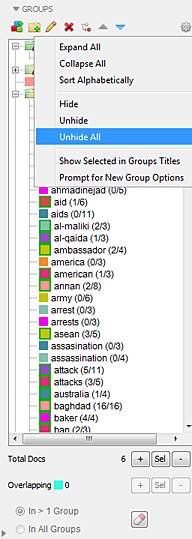
The following numbers correspond to those on the Groups image.
|
There are many ways to create a group:

 If Prompt for New Group Options is off, when you create a new group it is given a default title and assigned a group color. You can change the title and color later if you wish by highlighting the group in the list and clicking the Edit button.
You can create a group from documents that are visible in the Document Viewer, i.e., either selected or, if groups are visible, members of highlighted groups. See the Document Viewer for how to do this.
Any nodes you create in Search Networks will automatically be propagated to the Groups Tool as locked groups, where they can be highlighted and their members selected. Such groups can be modified in Search Networks only.
When a dataset is created, IN-SPIRE can create groups for each of the values found in categorical fields in the source documents. This can be a real time-saver if, for example, your fields include "Region," "Country," or other parameters important to your analysis. Instead of your having to define the fields at dataset creation time and then later having to search for the values in them so you can create groups manually, IN-SPIRE can do it for you, automatically. See Formatting Datatset Fields.
When a dataset is created, IN-SPIRE also automatically makes groups from the Themes it finds in it. Themes are terms which frequently occur together. Themes are also locked groups.
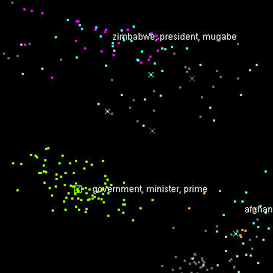 In the Groups tool, highlight one or more groups in the list. Documents belonging to the highlighted groups will be represented in the Galaxy in one of three ways:
The number of selected documents within a group is found
next to the group title. For example, (0/66) indicates that of the 66 documents in the group, none are selected. By default, this information is visible; to turn it off, deselect Settings![]() > Show Selected in Group Titles.
> Show Selected in Group Titles.
"Total Docs" (#5 on the Groups panel image, above) is the total number of unique documents in all highlighted groups.
 Overlap includes documents that occur in more than one highlighted group; in the Galaxy they are colored cyan by default. Refine this collection by selecting one of the radio buttons In > 1 Group or In All Groups. "In All Groups" means "all highlighted groups" (not all groups there are). In the diagram at left, if Group1, Group2 and Group 3 are highlighted, then "In > 1 Group" would be represented by the darker cyan areas, and "In All Groups" would be represented by the lighter cyan area in the center.
| Select buttons for Total Docs | |

|
Adds documents in highlighted group(s) to the selection set. In other words, it selects all documents in highlighted group(s), without deselecting any other documents that might be selected. |

|
Selects only the documents in the highlighted group(s) and deselects any other documents. |

|
Deselects only documents in a highlighted group or groups, leaving any others selected. |
|
Select buttons for Overlap |
|
|
|
Adds documents in the overlap to the selection set. |
|
|
Selects only documents in the overlap. |
|
|
Deselects documents in the overlap. |

|
Clears all selected documents. |
To view a summary of the evidence in highlighted groups, open the Ratings tool. The groups that are represented are those highlighted in the Groups list. You can view the documents in these groups in the Document Viewer (from the Document Viewer's menus, choose Settings![]() > Groups and Evidence Ratings).
> Groups and Evidence Ratings).
 .
.Highlight the group in the Groups list and click the Delete  button.
Groups are automatically saved when you close the dataset or exit IN-SPIRE. You can also save them manually by choosing File >Save Session from the IN-SPIRE main toolbar. Searches, viewed documents, and outliers will also be saved.
You can:
Click on the group or folder you want to move, and drag it to the new location, or
Click the up or down arrow ![]()
![]() buttons to move it up or down in the list.
buttons to move it up or down in the list.
 button. button. You can change the name on the Edit Group window.
There are two ways to move a group into a folder. You can click on the name of the group and drag it to the folder, or
Highlight the name of the group and click the Move  button. From the drop-down list, select the name of the folder to which you want to move it.
If you have a large number of groups, not all of which you are using at the current time, you may find it useful to hide some of the clutter. Categorical fields, for example, can sometimes contain a very large number of values, not all of which are useful to the analysis. Hiding a group merely makes it invisible in the Groups tool list. You can hide both locked and unlocked groups and folders.
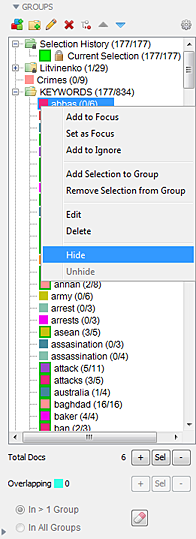 |
To hide a group or folder: Click on the group or on the folder and choose Settings |
 |
To unhide all hidden groups and folders: Select Settings |
You can set the focus on a group by dragging the group to Set Focus. You have the option of Setting Focus on groups of interest or removing those that are less interesting. To focus on a group, see Adding Groups to Focus for more details. To remove less interesting groups, see Removing Less Interesting Groups of Documents for more details.