You are here: Working with Projects and Datasets > Types of Datasets > Creating New Datasets
Creating New Datasets
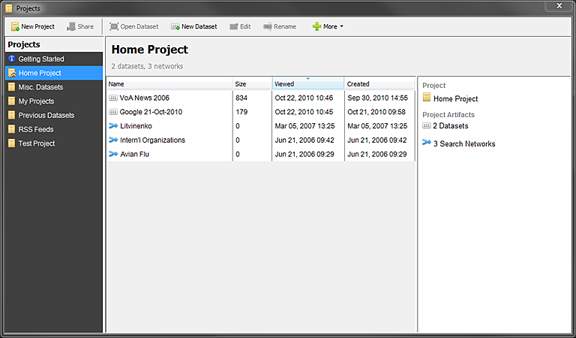
If IN-SPIRE is running, from the IN-SPIRE main menu, choose File > Projects..., or click the Projects button. The Projects window also appears automatically when IN-SPIRE starts up. It is the first window you will see after the splash screen.
Creating a Dataset
It is possible to create a single dataset by combining two others, see Merging Two Existing Datasets.
Usually, however, you will be creating a dataset from files that you already have, or by harvesting documents from the Web. With the exception of Word, RTF, PDF datasets, a dataset can contain only one type of data, the "type of dataset" being either the type of data that you already have (Text Files , Word, RTF or PDF documents, HTML files,JSON documents, XML documents, or Outlook email messages; or by the Internet search that will retrieve the data you want to use (e.g., Google, Web, RSS).
Basic Steps 1-3
- To create a new dataset, from the IN-SPIRE main menu choose File > Projects... to open the Projects window.
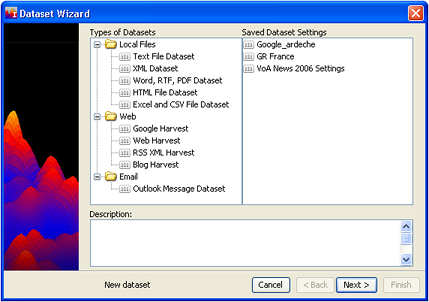
- On the Projects window, click New. The Dataset Wizard window opens.
-
Choose the type of dataset you want to create and click Next, or (if you have saved a settings template that you want to use) choose one of the items in the Saved Dataset Settings list.
The next steps depend on what you selected in Step 3.
- Local Files:
- Web Documents:
- Email
- To accept the default processing options and start processing, go to Start Processing. To set your own processing options, click Next and go to Optional Settings.
 If you start processing a text dataset at this point without defining any fields, all the fields in your data will be lumped together for the purposes of the analysis. If this is not what you want, click Next continue with Optional Settings.
Optional Settings
- Fields. If you are creating a Text or XML dataset, you can specify Fields.The default behavior for IN-SPIRE is for all the text in a document to be used for the analysis. However, if you have structured text documents with delimited sections, IN-SPIRE can be configured to analyze some document sections and not others. Click Add. The Field Properties window opens. See Fields for more information. There are special considerations when Using XML Data.
- Entity Extraction: If you have identified one or more fields as Computational, you can optionally choose to have entities extracted from them. IN-SPIRE includes a built-in set of extractors to extract objects like people, locations, web site URL, and IP Addresses. Other extractors (e.g. the Stanford NLP) can be added by the system administrator. Entity extraction is off by default, as processing time will increase with it on. To enable it, check the box at the top of the window, which will activate the table below it. Place a checkmark next to each extraction service you want applied to the computational fields. Each type of entity (e.g. Locations, People) will create a Group Folder in the dataset with individual entities as groups. (Note, full details are available about the open-source GATE (ANNIE) engine on their website.)
- Stopwords: These are words which the text engine ignores during text processing; they will be eliminated from the dataset. This means they will not appear in any of the tools such as Summary, and they will not be found when you search the dataset.
- To edit the stopword list, click Next until the Stopword List window opens.
- To delete a word from this list, click on it to select it, then click Delete.
- To edit a word, click Edit.
- To add words to the list, click Add. For more information, see Stopwords.
- Stopmajor list: Terms that you want to be available for Summary and searching, but do not want considered as major terms when determining document relatedness. For more information, see Stopmajor Words.
- Saved Phrases: Your data contains phrases which will be important to your analysis. You can identify these phrases to the IN-SPIRE text engine on the Saved Phrases screen. For example, you might identify “United States”, or “enriched uranium” or “United Arab Emirates” as phrases. Once defined, these phrases will now be “major terms”, appear in peak labels, and be used for clustering documents in the Galaxy. You can save the list of phrases to a file for re-use. This provides an extremely powerful way of viewing your data.
- To create a new set of phrases, click Add. The Add Phrase window will open.
- Enter a phrase and click Add. Your phrase will appear on the Current Phrases list. The window will remain open.
- Keep adding as many phrases as you need. Click Done to exit the Add Phrase window and return to he Dataset Wizard.
- Click Save to save your current phrases.
- If you have phrases saved from an earlier session, you can click Load to select the file of saved phrases. Select the saved phrases file from the Open window and click Load. The saved phrases will display in the left-hand column. The entire list will be selected. To add the saved phrases to the Current Phrases column, click the arrow
 . You can also pick and choose phrases from the list and add them by single-clicking or by using CTRL-click to select only those phrases you need.
- Advanced Language Tools:
- Punctuation Rules. You can specify how punctuation characters in the text are treated by the text engine. Click Next until the Punctuation window opens. Click on the punctuation character of interest, then click Edit. For more information, see Punctuation Rules.
- Save settings check box: This feature allows you to save your processing settings so they can be used in subsequent visualizations. They will be available through the "Saved Settings" tab in the Dataset Editor. The saved settings include the document collection, formats, Stopwords, and stopmajor settings. Click the Save These Dataset Settings checkbox, and edit the name of the setting, if you wish.
Start Processing
- Click Finish to start processing. The Processing dialog opens, informing you that the dataset is being processed. Click OK. The dataset appears in the list of datasets in the Projects window. The icon next to the dataset shows three stages of progress. To see details of the processing, click More, then Status.